

🎨 Artist Guide: How to Add Your Artwork and Manage Your Store on the “Funoon” Platform”
4-minute read
Welcome to the Funoon community! Once you’ve successfully registered as a seller, the platform will open up new opportunities for you to showcase and manage your work through a comprehensive dashboard designed specifically to meet your artistic needs.
🌐 First: Accessing the Store Dashboard #
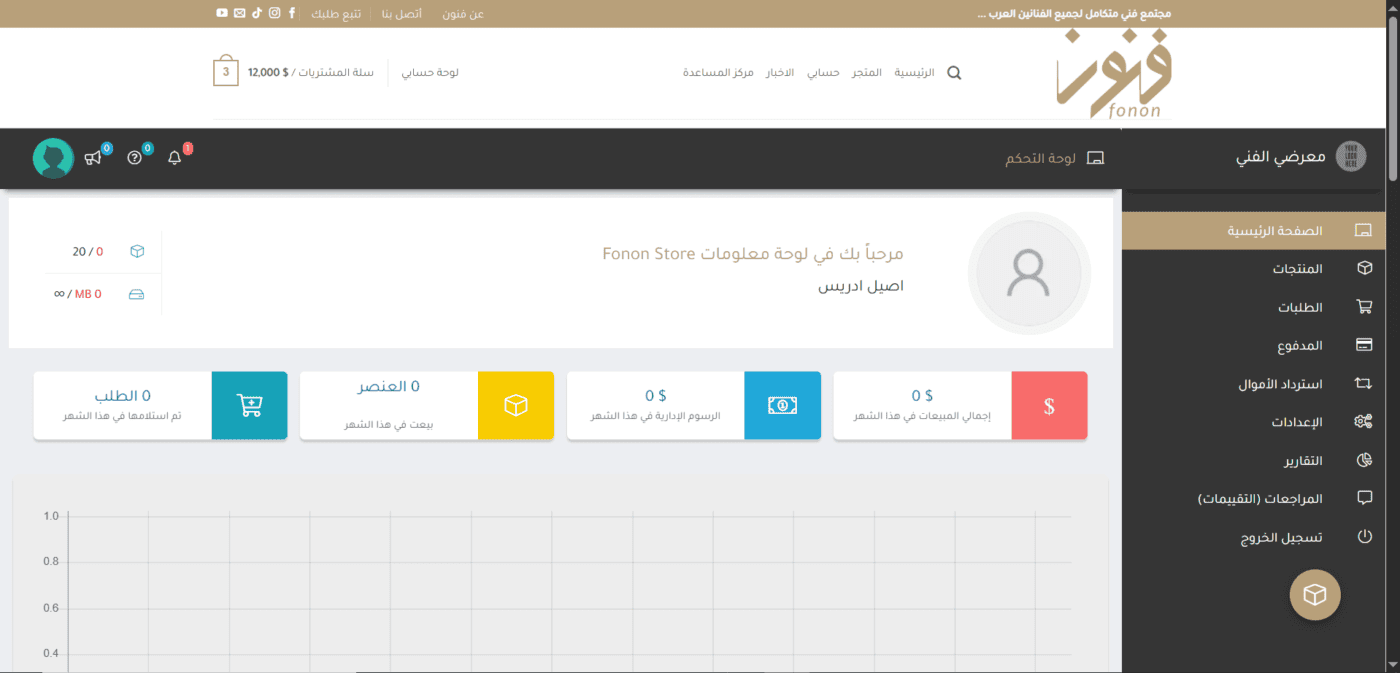
- Step 1: The Home Screen After Registration Once you've completed your registration as a seller, you'll be automatically redirected to Control Panel Home Page. This page is your operations center; it provides you with a concise summary and accurate statistics on your sales, profits, and the number of current orders in a visual and straightforward format.
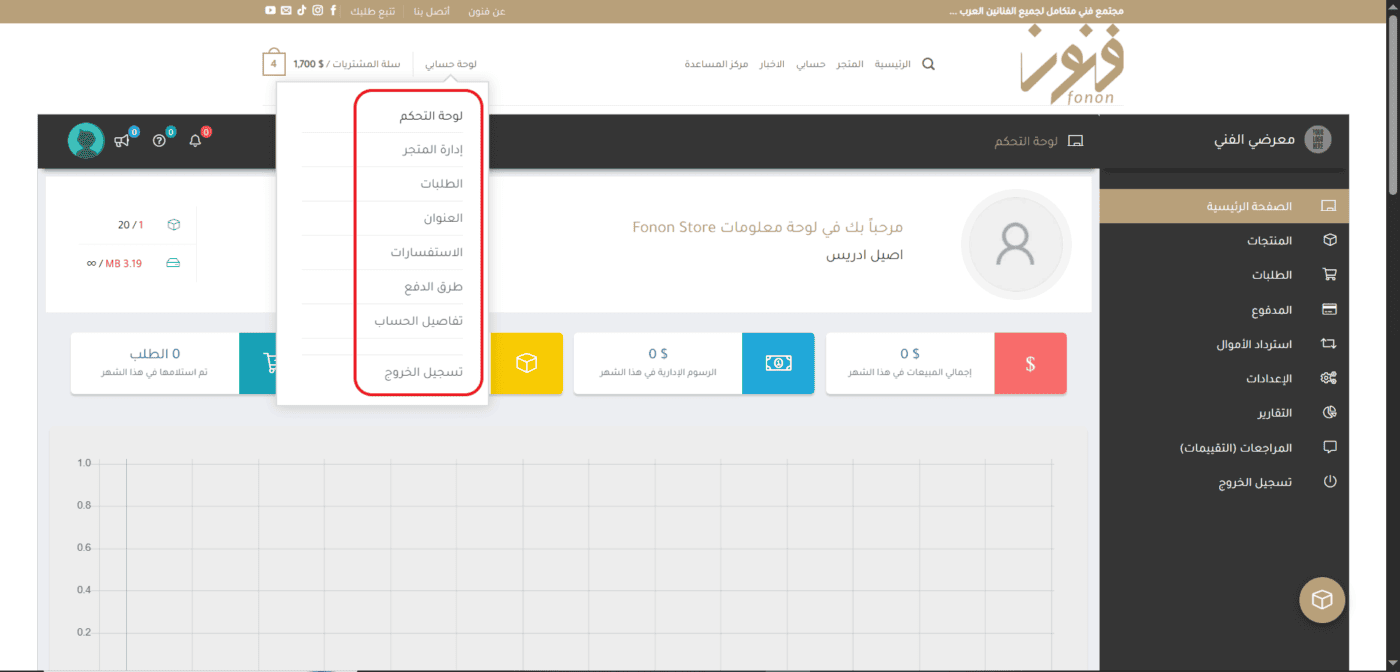
Step 2: Quick Access from the Drop-Down Menu Whenever you browse the site, you can quickly and easily access your store's admin panel. Simply hover your mouse over the "Your Account" option in the top menu, and you'll see Drop-down list (surrounded by a red border); click directly on it to “Store Management” or “Control Panel” Go behind the scenes of your exhibition.
🖼️ Second: Steps to add a new piece of art #
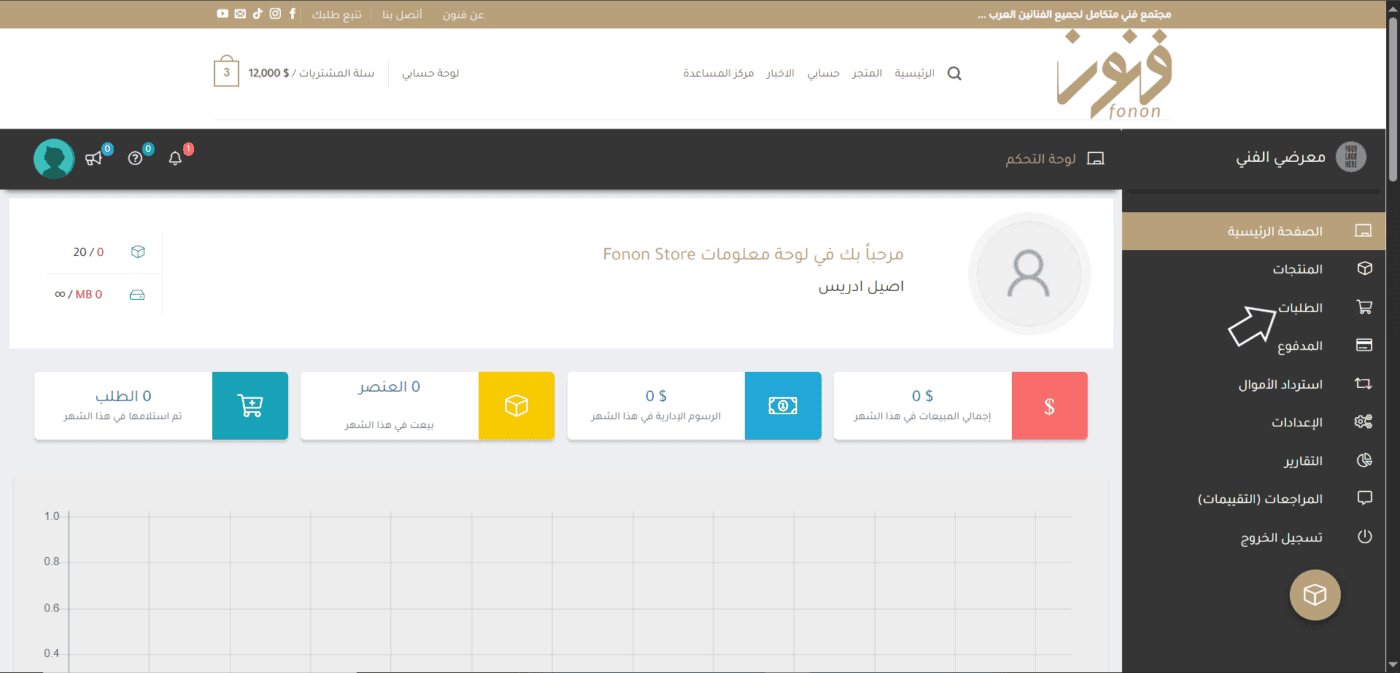
- Step 1: Go to the Products tab From the right-hand sidebar of the control panel, click the option “Products” Click the white arrow to open the portfolio for your artwork.
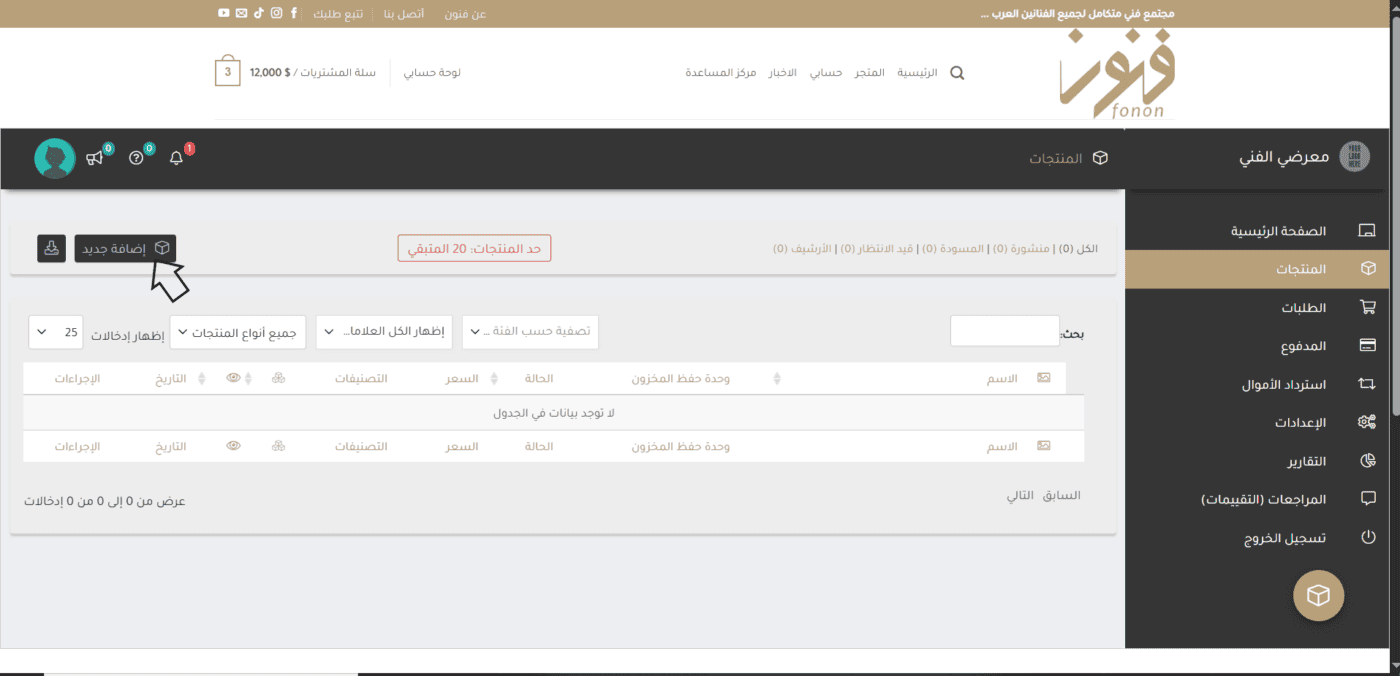
Step 2: Start adding a new job On the Product Management page, you'll find a prominent button labeled “Add New” It is indicated by a black arrow. Click on it to open the artwork details form.
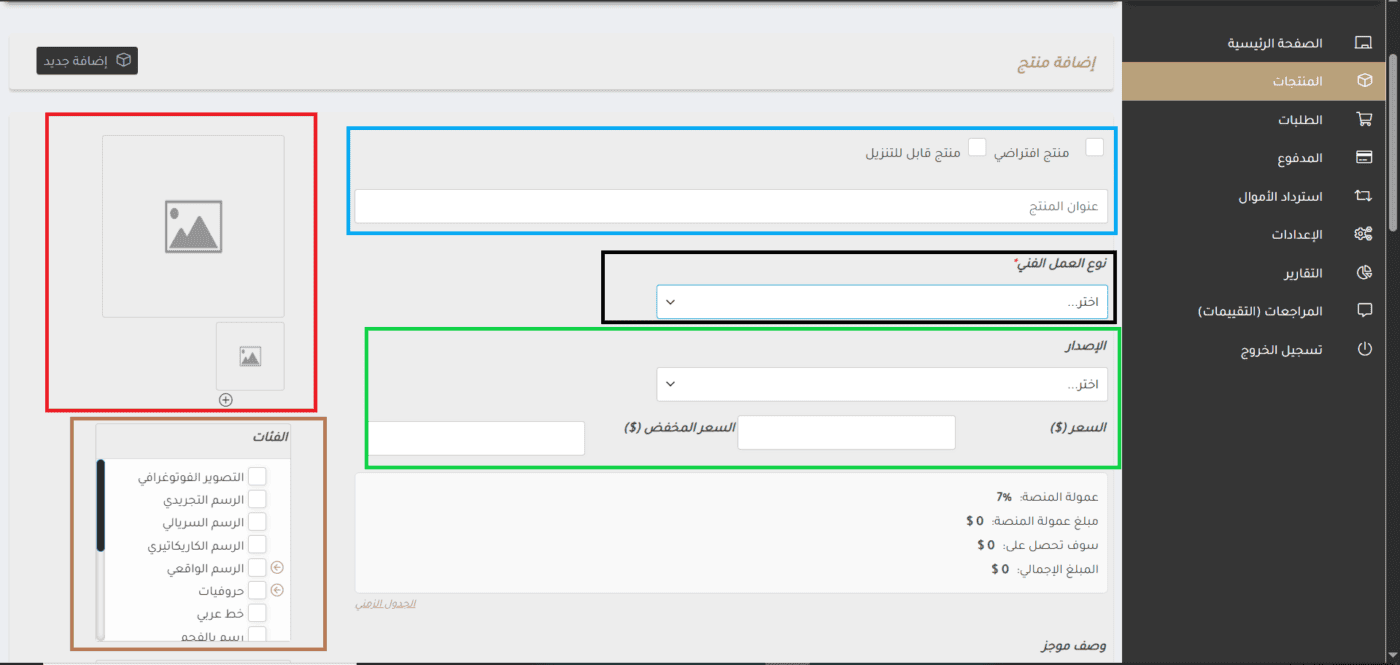
Step 3: Enter the basic data and prices for the panel Here, we develop the visual and financial identity of the artwork through organized and specific sections as follows:
- Blue Box: Type here “Product Name” (Name of your artwork), specifying the type of sale from the options below; leave it blank if the artwork is a physical item to be shipped, or select the option “Virtual Product” If the work is conceptual and does not require shipping, such as artwork, or if it has been activated “Downloadable product” If you're selling a digital artwork, the file will be downloaded immediately after payment.
- Red box: Your visual space: Click the large box to display the main image of the painting, and use the smaller box at the bottom to add additional images that showcase different angles and details of the artwork.
- 📸 Professional Visual Presentation Guide (Image Quality and Exhibition): “A painting is sold first and foremost to the buyer’s eye; therefore, it is essential that it be The original image is high-resolution, well-lit, and properly cropped Without showing the edges of the room or shadows from the phone, professional photos increase purchase rates by more than 70% and highlight the true value of your work, while poor-quality photos are automatically excluded from the interface.
- And in Additional Photo Gallery, Avoid duplicating the main image entirely; instead, be sure to provide a vivid experience for the buyer by adding:
- A very close-up (zoom-in) view of the brushstrokes and color highlights.
- A clear photo of the painting's back, stretcher frame, and signature.
- A realistic mockup of the painting hanging on the wall of a room or living room to help the buyer visualize its actual size in their own space.
- Black box: Select the “Art Type” that matches your canvas material from the drop-down menu.
- Green Box: Select “Edition” (whether it is an original painting or a print), then enter Price ($), and you can enter a discounted price in the field Reduced price If you'd like to offer customers a discount.
- 💰 Note on Panel Pricing and Secure Shipping: “When setting the price for your painting, remember that You are fully responsible for shipping and professional packaging costs; so be sure to calculate it in advance, including the platform's commission, and add it to the original price of the painting so that your profit is worthwhile. You are also required to Shipment Insurance Work with the shipping company to ensure you receive financial compensation and that the panel is returned for repair or replacement if it breaks or is damaged during transport. (Note: When using the ‘Discounted Price’ field, make the offer available for a limited time to create a sense of urgency among buyers.).
- Brown box: Select the art “categories” that match your style (such as abstract art, Arabic calligraphy, surrealist art, and others) to ensure that your artwork is accurately presented to your target audience.
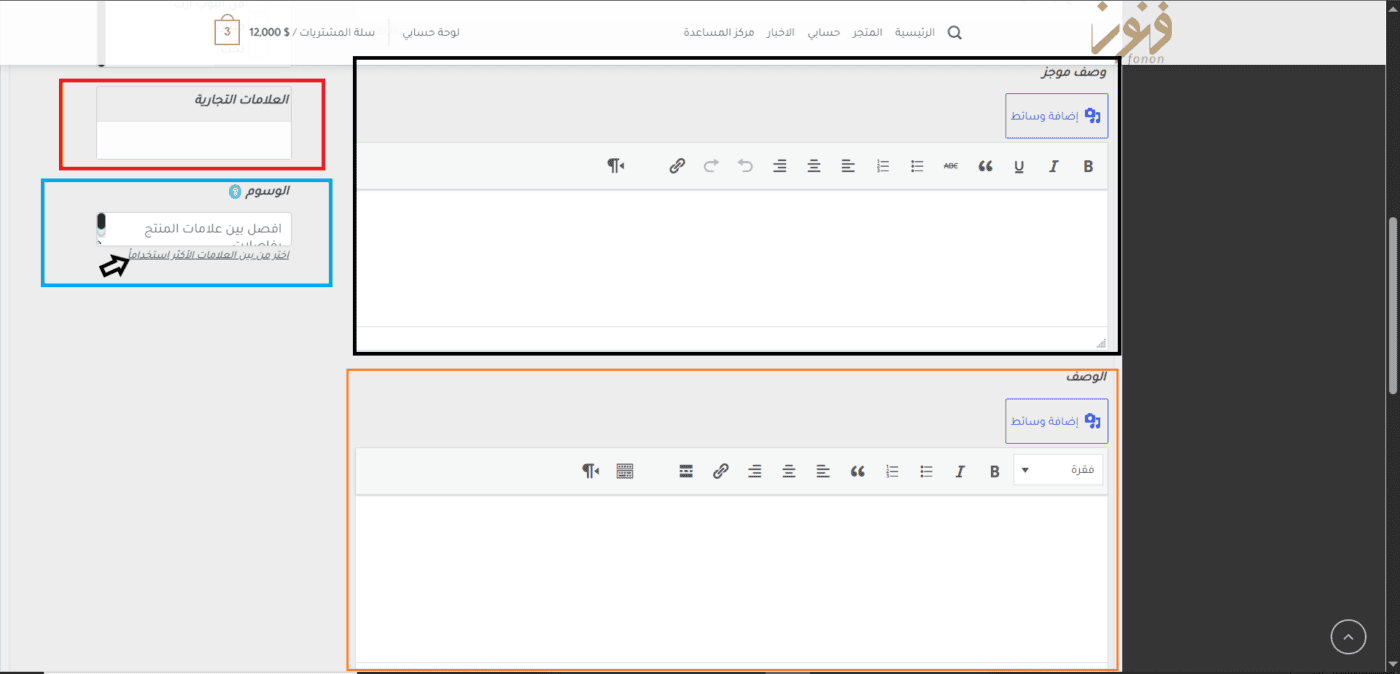
Step 4: Write the description and promotional tags To give collectors a deeper understanding of your artistic journey and the background of the painting:
- Black Box (Brief Description): Write a brief promotional blurb that appears right next to the painting.
- Orange Box (Description): Enough space to explain the details of the painting, the inspiration behind it, and the tools used.
- The red and blue frame: Enter “brands” and ”tags” (keywords indicated by the black arrow) to help organize your board and make it easier to find when searching.
- 📜 Story Requirements and Artistic Considerations (Strict Administrative Notice): “A collector doesn’t just buy colors; they buy a complete artistic narrative. The comprehensive description must include: the exact dimensions of the painting (height × width in centimeters), the materials used (e.g., acrylic paints on stretched canvas), and a clarification of whether the painting is protected by a layer of varnish against dust and sunlight, as well as two lines explaining the idea or inspiration behind the work.”.
- ⚠️ A Fateful Note: If these details are not fully included in the description, The system will automatically pin the post and unpin it... and it will not appear in the public buyer directory until you have updated this information.
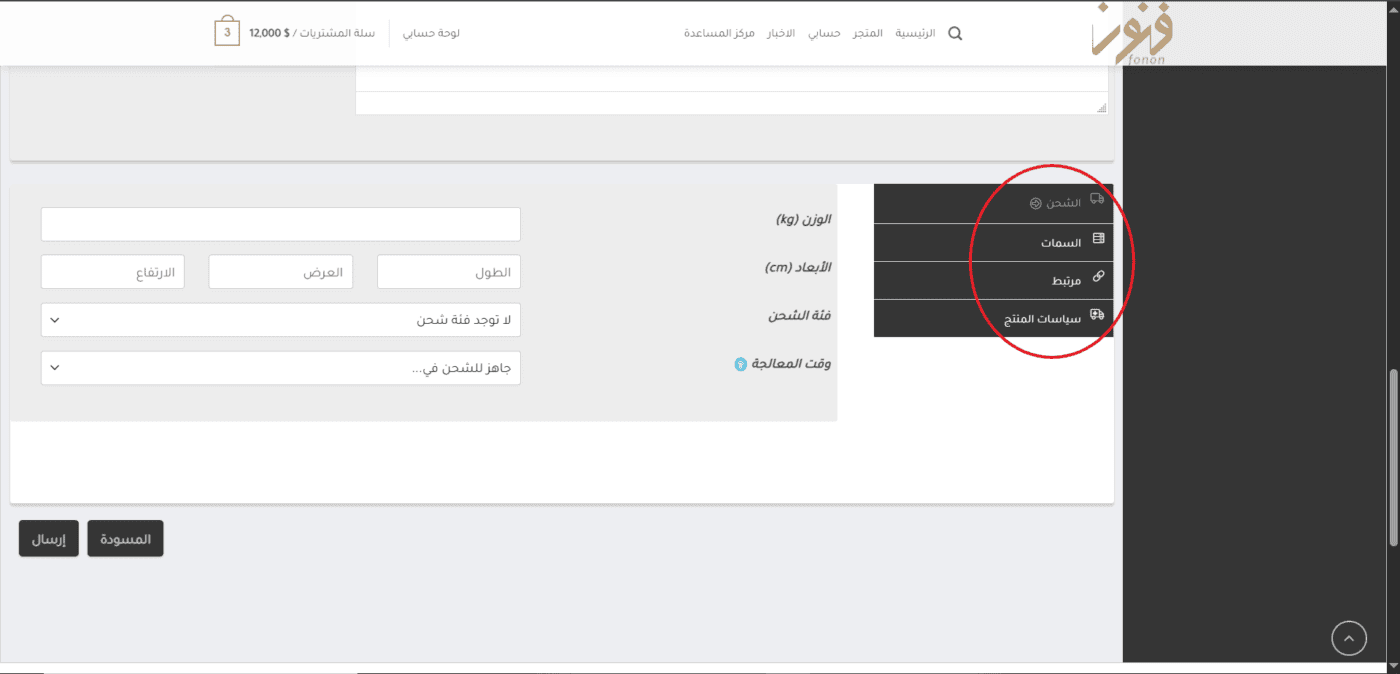
Step 5: Shipping Settings and Business Policies In this section (circled in red), you'll find important sub-tabs for handling the logistical aspects:
- Shipping: Enter the panel's weight and dimensions (length, width, height) to ensure that delivery costs are calculated accurately.
- Features, Related, and Product Policies: To specify any additional options or return policies specific to the artwork.
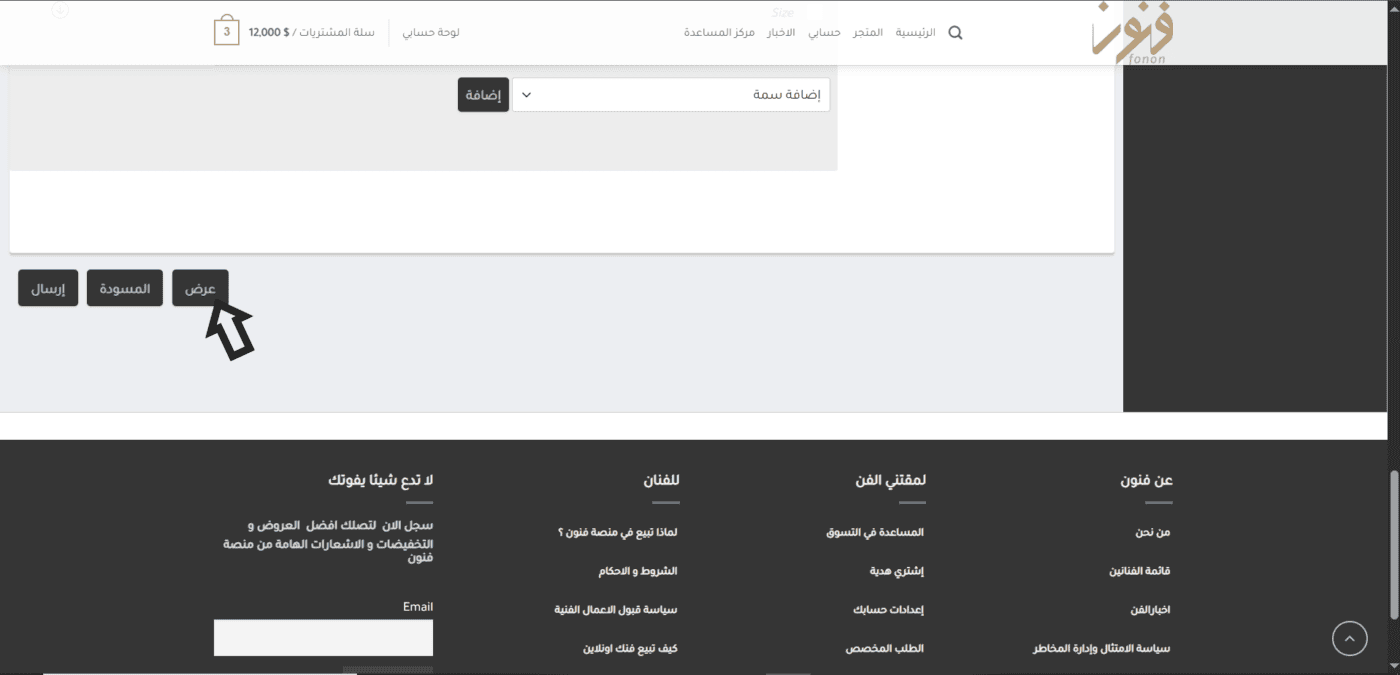
Step 6: Preview and Publish the Post We've reached the final step! Before publishing the painting to the public, the website offers you flexible options at the bottom of the page:
- “Draft” button: To save your work and finish it later.
- “Send” button: To officially display the painting at the exhibition and begin accepting purchase orders.
- “View” button: (Indicated by the black arrow) allows you to preview how the illuminated panel will look in the store after shipping.


Powered by BetterDocs